Part 2: Multi-Tile UV Mapping
Part 2: Multi-Tile Painting in Mudbox
By Brian Freisinger
October 17, 2011
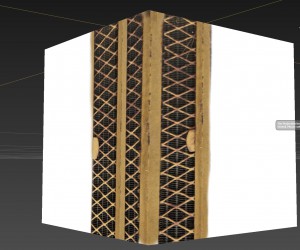
In Part 1, you should have created a basic Cube geo and a mult-tile UV map.
We’ll now export our multi-tiled geometry as an .OBJ and bring it into mudbox
On a side note, I generally stick with the .OBJ export instead of .FBX for maya/mudbox back and forth. FBX has a tendency to scale an object up or down by a power of 100 depending on unit settings, and this will cause severe problem when painting a 32 bit displacement map.
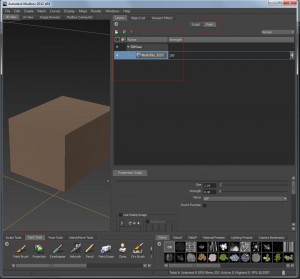
32 bit displacement maps are object scale dependant in the calculations of displacement. So I stick with the .obj format which imports and exports a perfect 1:1So export your Cube as an .obj and import it into mudbox.(if it looks weirdly shaded coming in, turn smooth shade off under the ‘display’ menu. Not necessary but it’ll keep this simple primitive from looking annoying while you’re trying to work.
Once it’s imported switch from your 3D view to the UV view using the tabs in the upper left corner.
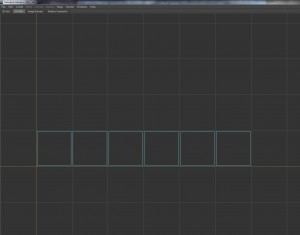
You should see a UV layout identical to what you exported from your Maya
Now that we’re certain we have a 1:1 UV layout we’ll start painting.
Everything I’m about to go over applies equally to extracting and using displacement maps, but because this mesh isn’t exactly parameterized to be a subdivision surface object we’ll cover displacement creation/extraction/assignment in a later section.
Switch back to the 3D view, and instead of ‘sculpt’ mode, switch to ‘paint’ mode using the upper right “Paint” tab. Make sure you switch to Paint tools and aren’t using sculpt tools.
Create a Mudbox Paint Layer at 2048 resolution.
I won’t get into the merits of .png vs .tiff (or .exr vs tiff for displacement) in this tutorial, so use whatever file format you want.
(For the record I use png for color and exr for displacement to get the best results.)Ok, so save your mudbox file and we’ll start laying down some quick paint.
I also generally switch my base material over to a Gesso in Mudbox for paint instead of that weird flesh tone default. But again, not necessary. But for painting I prefer working off a somewhat ‘white’ surface.
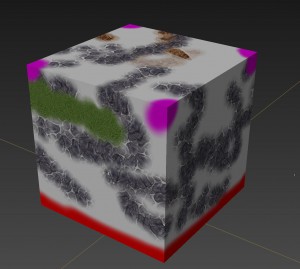
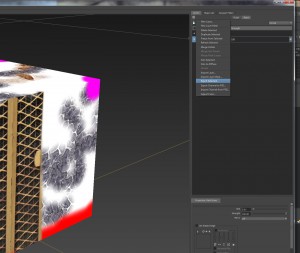
I just painted some random texture using the included stamps and some color for this.
I did however be sure to paint on the corners and around the bottom to show off how the seamless painting works with multi-tile and what it looks like in our UV window now.
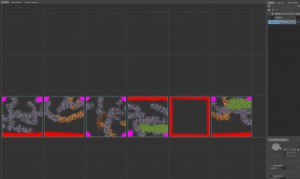
If you switch back from the 3D view to the UV view in Mudbox you’ll see we now have 6 separate texture maps for our object.
And also evident is the fact that it’s painting perfectly across the seams.
I created another layer and brought in a photo I took and used is as a stencil to paint along one edge quickly to show off how well mudbox paints across discontinuous UV maps.
So, if you decide to paint another layer or two go ahead. When you’re done save your working file, and flatten your paint layers. (Merge Visible in your Mudbox Menu)
You can export each layer separately and continue working in Photoshop or another image manipulation package, but for ease in this tutorial we just want one layer exported with our UV tile coordinates.
So once we have a single layer we’ll export it. Mudbox has a variety of way to export but we’ll just use the ‘export selected’ function (make sure you have your texture selected of course)Export it to a directory of choice. In production I make a lot of subdirectories for my maps with the object name included because of the sheer volume of maps I end up working with.
Your end result after exporting should be something like this.
As I mentioned earlier, this all works in an identical fashion with displacement mapping.
Once you extract your displacement maps and write them out they’ll come out with an identical u1_v1, u2_v1, etc coordinate system.
I highly recommend NEVER changing your uv coordinates at the end of the file. Changing the names is fine as long as you leave the coordinates the same. Reason? If you wish to re-import these into mudbox for any editing, both paint and displacement Mudbox looks for that coordinate I.D. to assign it to the correct tile.
So I can have a verson 2 or 3 of my original mudbox paint, that I edited in Photoshop, then import it back into Mudbox to clean up any seams or problems before kicking it back out to use in render. You just need to make sure that if you version up you put it before your U and V coordinate ID;
CubePaint_Tutorial_01_u4_v1.png
CubePaint_Tutorial_02_u4_v1.png
Now that we have both a Multi-Tile piece of Geometry and associated Texture Maps we’ll move on to assignment for rendering.
Part 3: Muli-Tile Shader Setup/Rendering in Maya.
Tags: CG, Vray, multiple UV, multiTile, multi-tile, UV mapping
