Vray Light Select Script
Using Vray Render Elements, Making Specular Vray Materials, using Vray_Light_Select, basic Vray Compositing in Nuke.
Brian Freisinger
Feb 19 2012
UPDATE: May 7 2012 – The script wasn’t working correctly in Maya 2012 and Vray 2.2. It’s been updated to now work properly.
(This tutorial requires Maya 2011 or higher, Vray 2.0 and Nuke or AfterEffects/Photoshop)
Click on any image to enlarge.
For the most part, the vray render elements are very straight forward and easy to access (not to mention easy to set up for composite)
In my opinion, the only one that requires a little more fiddling, as well as opens up a wide variety of user mistakes is the vrayRE_Light_Select.
This tutorial will only cover very basic light pass/compositing techniques to demonstrate the Light_Select technique and introduce a nice MEL script to make your life easier.
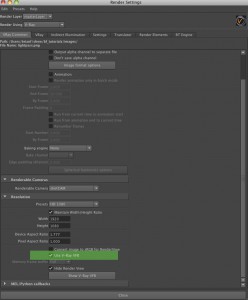
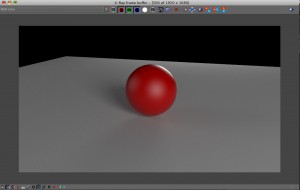
The first thing necessary for working with your render elements is to switch over to the Vray VFB (Vray Frame Buffer) to view your images and passes. This will also allow you to quickly view your images in both linear and SRGB color space.
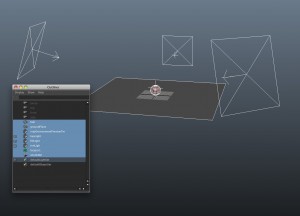
I built an simple example scene with a sphere and ground plane. In addition I created three Vray rectangular lights for standard three point lighting.
(Standard maya lights also work for this, but I prefer using the Vray native lights)
You’ll notice right away I’ve named my lights and objects. It’s just a good standard practice.
It can be as complex or simple as you like, but later on knowing which light you’re looking with or modifying in compositing makes it priceless.
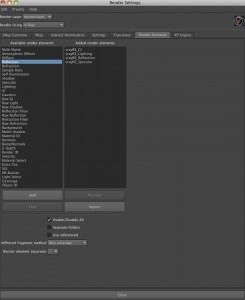
The first thing we’ll do is set up our Render Elements found under the Render Settings.
You’ll see a huge list of possibilities under this tab, but for simplicity we’ll just do one of the more basic setups.
As I mentioned before, we’re just going to focus on these basic controls since the point here is about Light Passes, not advanced compositing and pass management.
A little note about the specular pass and specular materials in Vray.
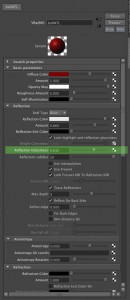
More spec and less reflection on an object is controlled by the “Reflection Glossiness” in the Material Editor.
Glossiness set for a mix of spec and reflection.
If the Reflection Glossiness is set for 1.0 you’ll see no specular whatsoever in the spec pass. It’s all being pumped through the reflection pass. Great for a mirror ball, bad for a bowling ball…
So for our test I want a mix of both, with hot spec we can see, hence my .632 range.
Now with the lights set, material set and render elements set we can render.
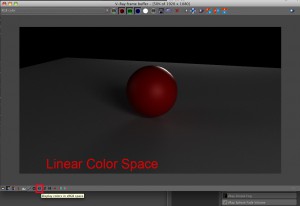
To switch between linear and SRGB color space you need to click on this button.
I will be writing a tutorial in the future on Linear Workflow, but if you’re unfamiliar with it basically in Linear color space the image should look far darker than the SRGB space.
SRGB is how we’re seeing it on our monitor, Linear is the “true” color space and gives us more room to move in compositing especially with our whites/blacks and other post correction.
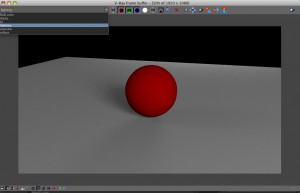
Next up is our ability to see our passes using the VFB.
What we’re looking at in the “lighting” pass is simply the combination of the shadow and diffuse pass. We’re also left with very limited control of the lights.
If we were to write these out for compositing they’d be combined with a Plus Merge in Nuke (Linear Dodge/Add in Adobe products)
So, how do we break each light out separately?
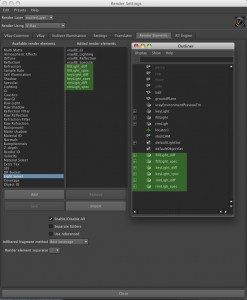
We’re going back to our Render Element Tab in the Render Settings and a new pass.
At this point we’ll need to use the VrayRE_Light Select to isolate our lights.
As a test we can just set one up quickly and hook into the render.
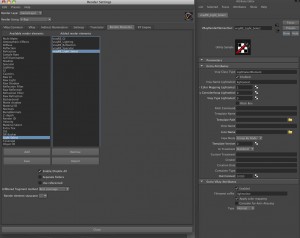
Just double click on it as you would any pass and it should appear in the right column.
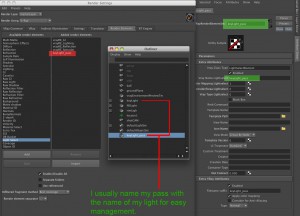
Just like we wanted to name our lights earlier, we’ll want to name our Light_Select to know which light it’s controlling.
Let’s start off by using the keyLight for our test.
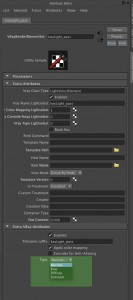
I’m just changing the fields highlighted in green.
The top one effects how it’s seen in the render elements tab as well as the outliner.
The field below it in green effects how it’s seen in the next step, the set editor.
Currently the “Type” (at the bottom of the image in Figure 10) is set for “Normal”
We’ll get into the more advanced functions of this later.
Just because the pass was created and named the same as the light doesn’t mean it automagically knows which light to connect to unfortunately.
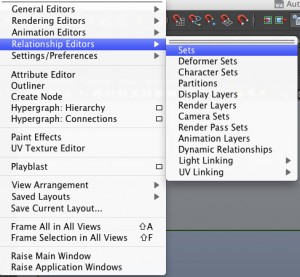
So we’ll have to open up the set editor.
The set editor is found under: Windows ->Relationship Editors -> Sets
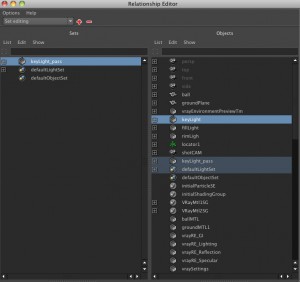
Once the window comes up any Vray Light Select element we’ve made should show up in the left column. This is also why naming your light pass and light is relatively important.
Simply select the light pass on in the left column, and then select the correct light in the right column. In our case it’s the keyLight_pass connected to the keyLight
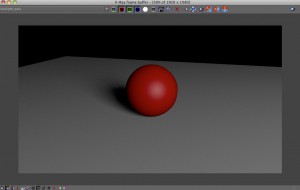
Now if we re-render our image with the VFB active we can look at our keyLight_pass
We’ve got the light now seperated, but comparing it to the lighting pass and the specular pass we can see that the new pass (keyLight_pass) has not only the lighting, but the specular combined. This will be a problem later on in compositing since generally having your light pass and spec pass separated give a lot more control.
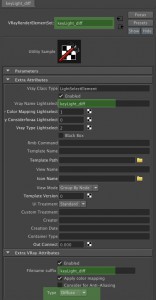
Looking back at the keyLight_pass in the attribute editor we can go down to the bottom and see some options under “Type” : Normal, Raw, Diffuse, Specular
We left it at default, so now we’ll switch it over to “Diffuse” and re-render the image.
I’m also going to take the time to rename my pass from “keyLight_pass” to “keyLight_diff”
The reason being, we will have to connect up a “keyLight_spec” pass seperately if we want that as an individual control. When they write out a multichannel EXR or single files you’ll want to know what’s what when putting the comp together. It’ll also help diagnose problem using the VFB
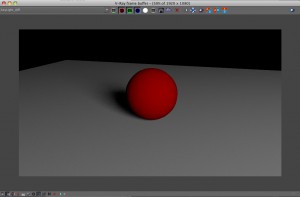
The new render shows that we lost all the spec from our first render.
That’s good, but we’ll need to make another pass to get the spec and hook it up in the set editor.
Setting this up for production at this point would require six passes just for the lights.
(Three Diffuse and Three Specular) Doing this manually can be a major pain.
First off it’s easy to make a mistake. I’ve often forgot to set a pass to be diffuse, or accidentally set two to be specular. Forget to connect a new pass up in the set editor. Lost all my passes and connections when Maya decided to be helpful and ‘clean up unknown nodes…’ etc etc
So I wrote a mel script to do all this for you.
I walked through the process of doing this manually so we’d understand what’s going on under the hood.
Ok, on with the script:
Here’s the code:
////////////////////////////////////////////////////
//Create Vray LightPass Render Elements//
//Dec 2011
//Updated May 2012 for Vray 2.2
//Brian Freisinger
//faust@disopolis.com
//www.disopolis.com
//Feel free to steal, edit, modify.
///////////////////////////////////////////////////
//Call selection list
global proc vrLightPass () {
//Call selection list
string $vRE_Light[] = `ls -sl`;
for ($selection in $vRE_Light)
{
string $vrayLS = $selection;
string $diff = "_diff";
string $spec = "_spec";
//create diffuse pass
string $diffs = `vrayAddRenderElement LightSelectElement`;
string $vRE_diff[];
$vRE_diff[0] = $diffs;
//set diffuseFLAG
setAttr "vrayRE_Light_Select.vray_type_lightselect" 2;
//Set render outputname for diffuse
setAttr -type "string" vrayRE_Light_Select.vray_name_lightselect ($selection + $diff);
rename $vRE_diff ($selection + $diff);
//create spec pass
string $specs = `vrayAddRenderElement LightSelectElement`;
string $vRE_spec[];
$vRE_diff[0] = $specs;
setAttr "vrayRE_Light_Select.vray_type_lightselect" 3;
//Set render outputname for spec
setAttr -type "string" vrayRE_Light_Select.vray_name_lightselect ($selection + $spec);
rename $vRE_spec ($selection + $spec);
//Set relationships
connectAttr ($vrayLS + ".instObjGroups[0]") ($vrayLS + "_diff.dagSetMembers[0]");
connectAttr ($vrayLS + ".instObjGroups[0]") ($vrayLS + "_spec.dagSetMembers[0]");
}
}
///endcode///
You can also download it here if the wordpress formatting throws you some errors.
Start by sourcing the code.
Then select the lights you want to make passes out of.
I created a keyLight, fillLight and rimLight so I’ll select those three.
then in the command line type
vrLightPass;
and press enter.
Now I’ve got six passes, all properly named and all properly assigned.
I really don’t need the original lighting pass or the original specular pass anymore, but I keep them around so when I comp the shot I have something besides the beauty pass around to make sure I got everything right.
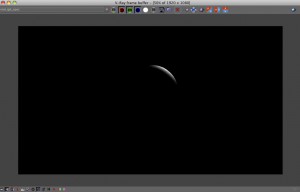
So now we re-render the image and we’ll take a look at the rimLight_spec pass.
So that’s it. All our light passes are broken out.
Be aware, you CANNOT break out your reflection per light, the render engine doesn’t work that way. There are comp tricks using the light or spec pass to dial up or dial down your reflection per light, but as a pass, it’s all or nothing. Same goes for Refraction.
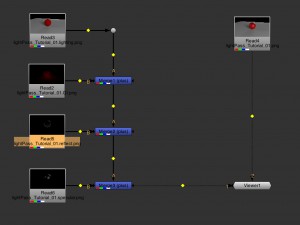
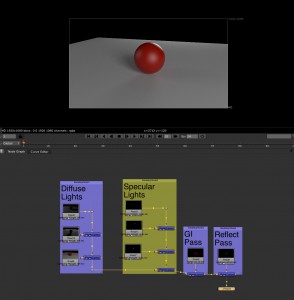
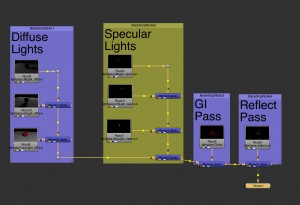
Once you write out your passes compositing them is pretty simple, in Nuke it’s all merge plus nodes. (Or linear burn (add) in adobe products)
Here’s a quick close up of the Nuke Script
And that’s basic light pass/compositing with Vray.
man, just went over this again. so clear. thanks.
Brian,tnx for the script but it doesn’t seem to work in Maya 2012 SAP
Any ideas?
// Error: string $vRE_spec[] = `vrayAddRenderElement LightSelectElement`;
//
// Error: Cannot cast data of type string to string[]. //
It was the stupid wordpress formatting.
In it’s “standard mode” it screws up the symbols “,’, etc
I changed the text format and tested it, it should work now. Thanks for letting me know that was still messed up.
Let me know if it still doesn’t work.
Thanks.
Brian
Now with the fixed formatting it runs fine, but it doesn’t produce any connections as it should from the selected light and pass as it does in the video tutorial..no errors as well..seems strange.
It works fine,my bad because I didn’t run it manually (vrLightPass; in mel command line).
Thanks a ton Brian for your efforts,really helpful script.
Cheers!
Thanks for the great in depth tutorial. But I have one question, how to get the Light Select pass to work with transparency?
Thank you so mush man! veeeeery useful